Summary
A while back I wrote a guide on pulling data from MySQL and sending it out via syslog. We didn't need to deal with a timestamp since Logstash was automatically adding one in the syslog header at ingest. However, in cases where you're sending directly to Elasticsearch via HTTP posts, you'll need to add a timestamp to make searching a lot easier. This guide will walk you through the process.
Elasticsearch
The Timestamp
Kibana does a decent job at figuring out which fields are timestamps in Elasticsearch when creating an index. Well, most of the time. I tried multiple date formats and couldn't figure out why Kibana wouldn't use any of them as timestamp. It turns out that all the JSON fields from NiFi are of the string data type, while the date needs to be of the... date type. Go figure.
Updating the Index Patterns
I'll preface this by saying that you'll need to change this to match your environment. I have NiFi configured to automatically create a new index every day with the date in the index name, similar to what you'll find with Beats and Logstash. The database being pulled is for Home Assistant, hence the hass in the index name. The index names are nifi-hass-2020.06.25, nifi-hass-2020.06.26, nifi-hass-2020.06.26, etc.
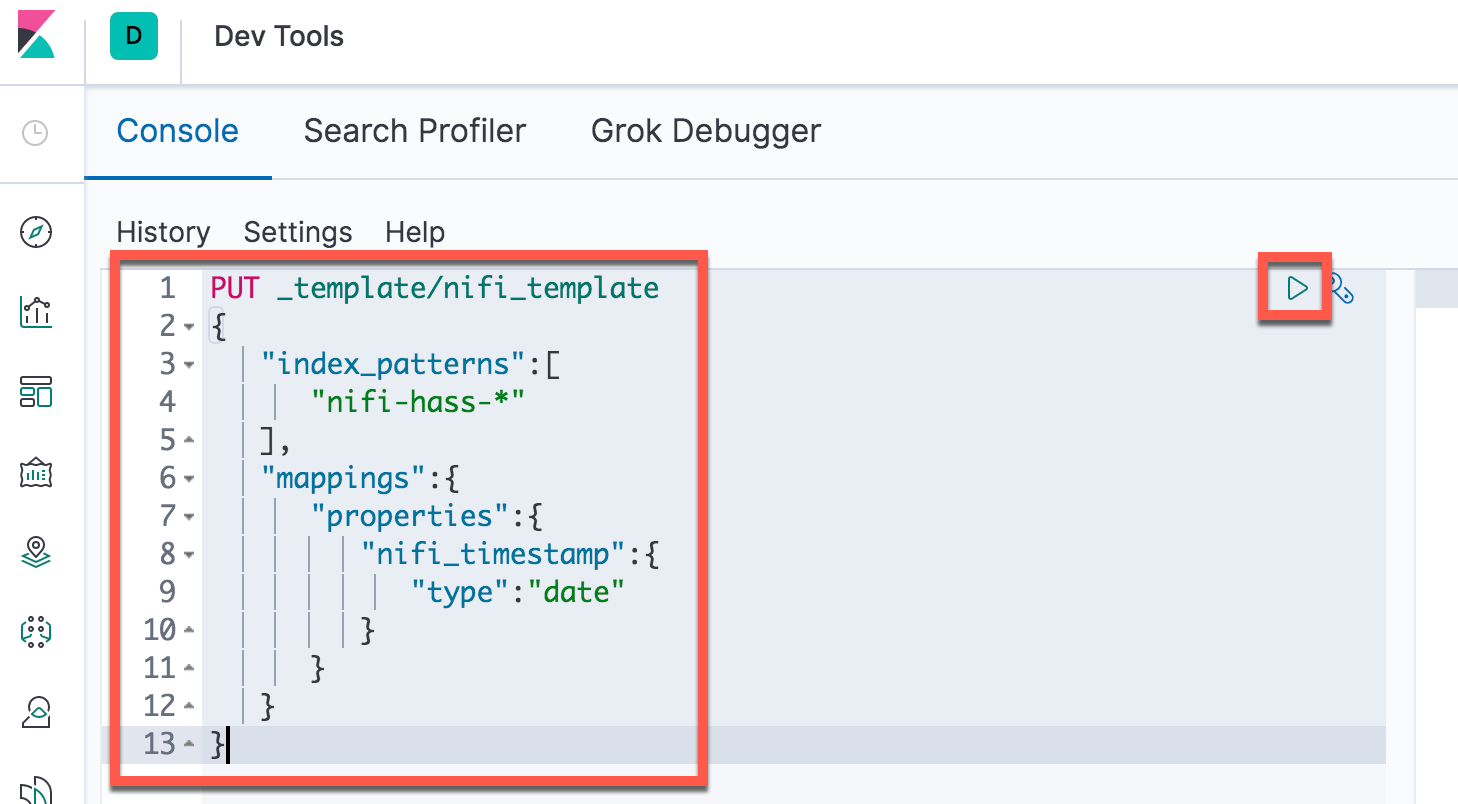
The timestamp we're adding to the NiFi flows is named nifi_timestamp. More details on that are listed below. However, before creating the index or the index patterns, we'll need to let Elasticsearch know that any field named nifi_timestamp should be considered a date type. You'll also want to know the name of the index pattern you'll be using. In this case it's nifi-hass-* which we haven't created yet. But first, go into the Kibana Dev Tools and add the following:
PUT _template/nifi_template
{
   "index_patterns":[
      "nifi-hass-*"
   ],
   "mappings":{
      "properties":{
         "nifi_timestamp":{
            "type":"date"
         }
      }
   }
}Click the Send Request button and you should get an acknowledgment.
At this point we've got Elasticsearch and Kibana ready for our logs.
Apache NiFi
Adding the Timestamp
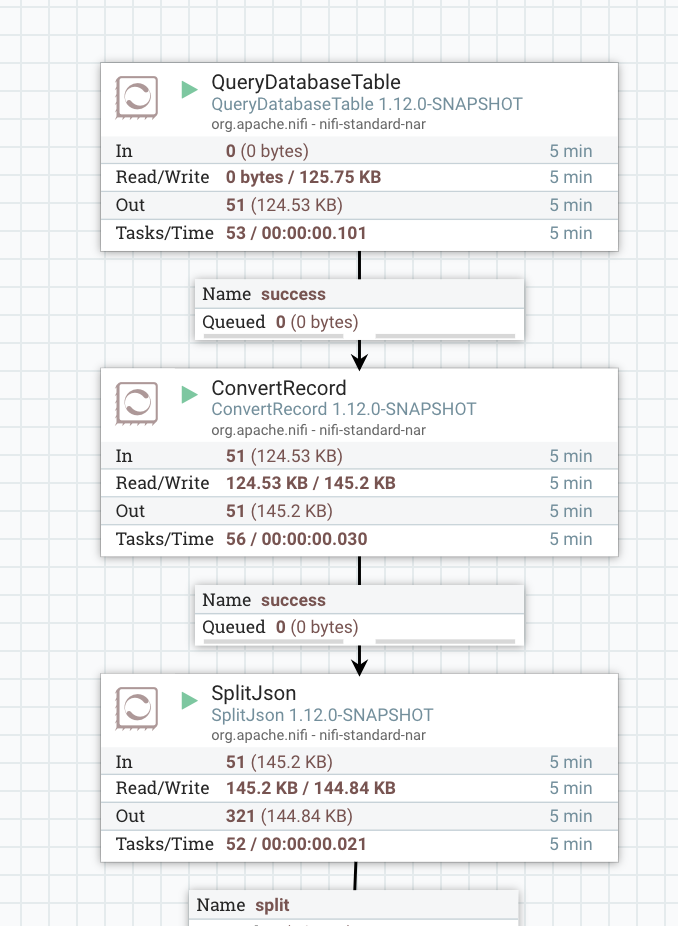
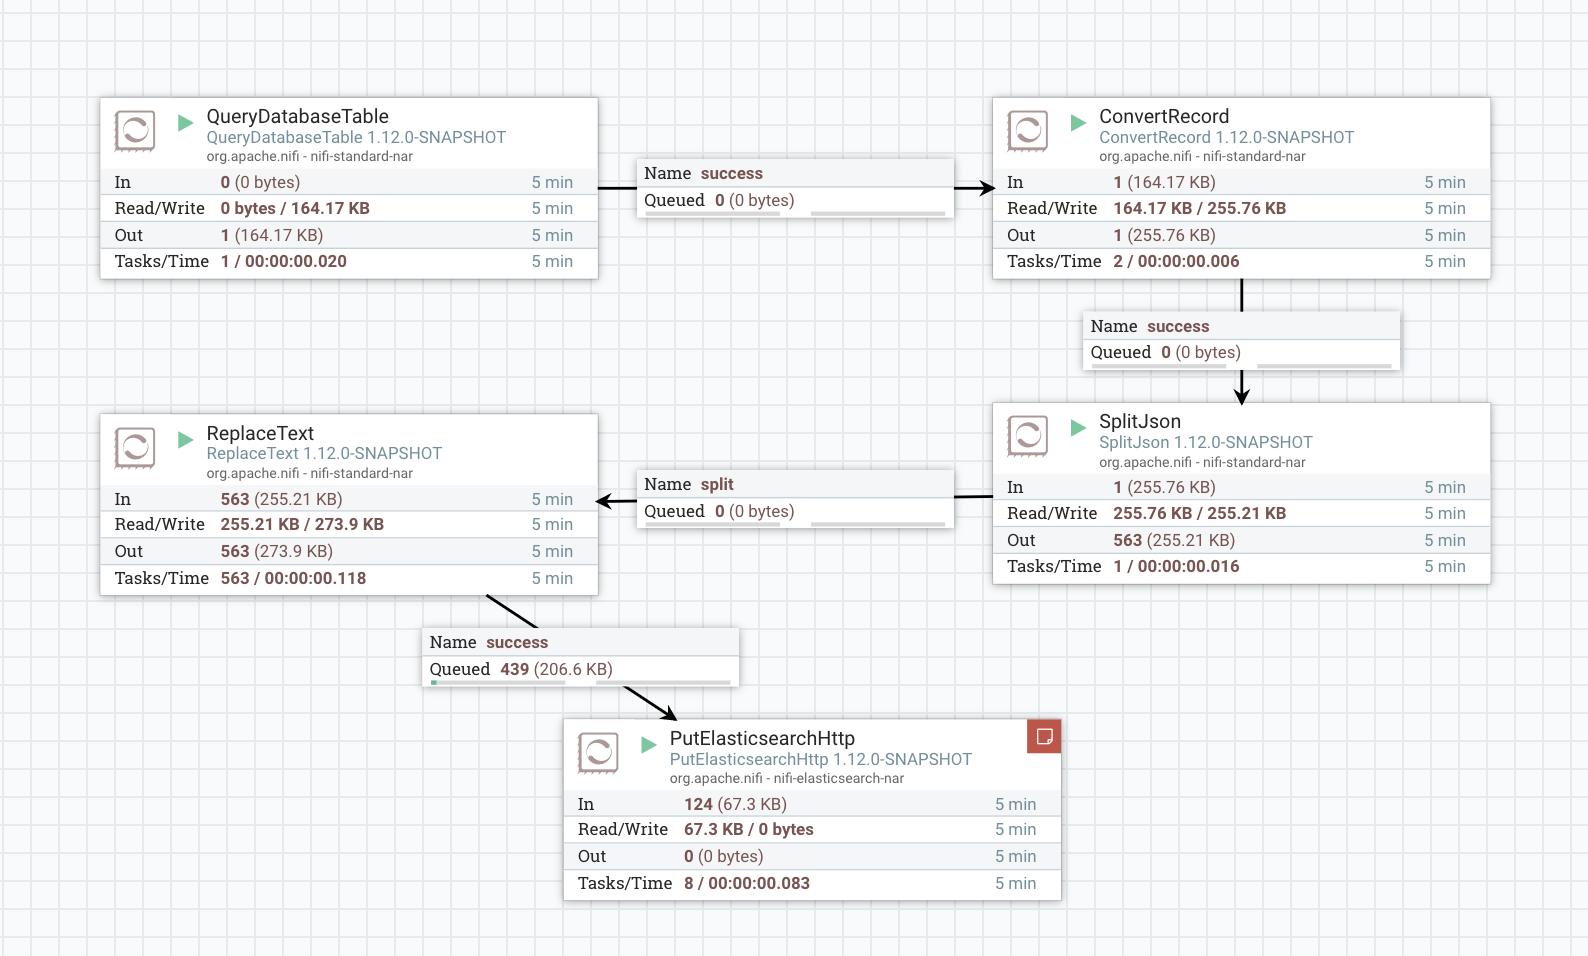
Referencing my previous posts, we've got NiFi pulling from MySQL and converting it directly to JSON. It should look similar to this:
Normally we'd just add the nifi_timestamp attribute with the UpdateAttribute processor. Unfortunately there aren't any attributes since we're going straight between the Avro and JSON formats. Instead, we'll go the KISS route and leverage the ReplaceText processor to swap in the nifi_timestamp value at the beginning of the JSON event.
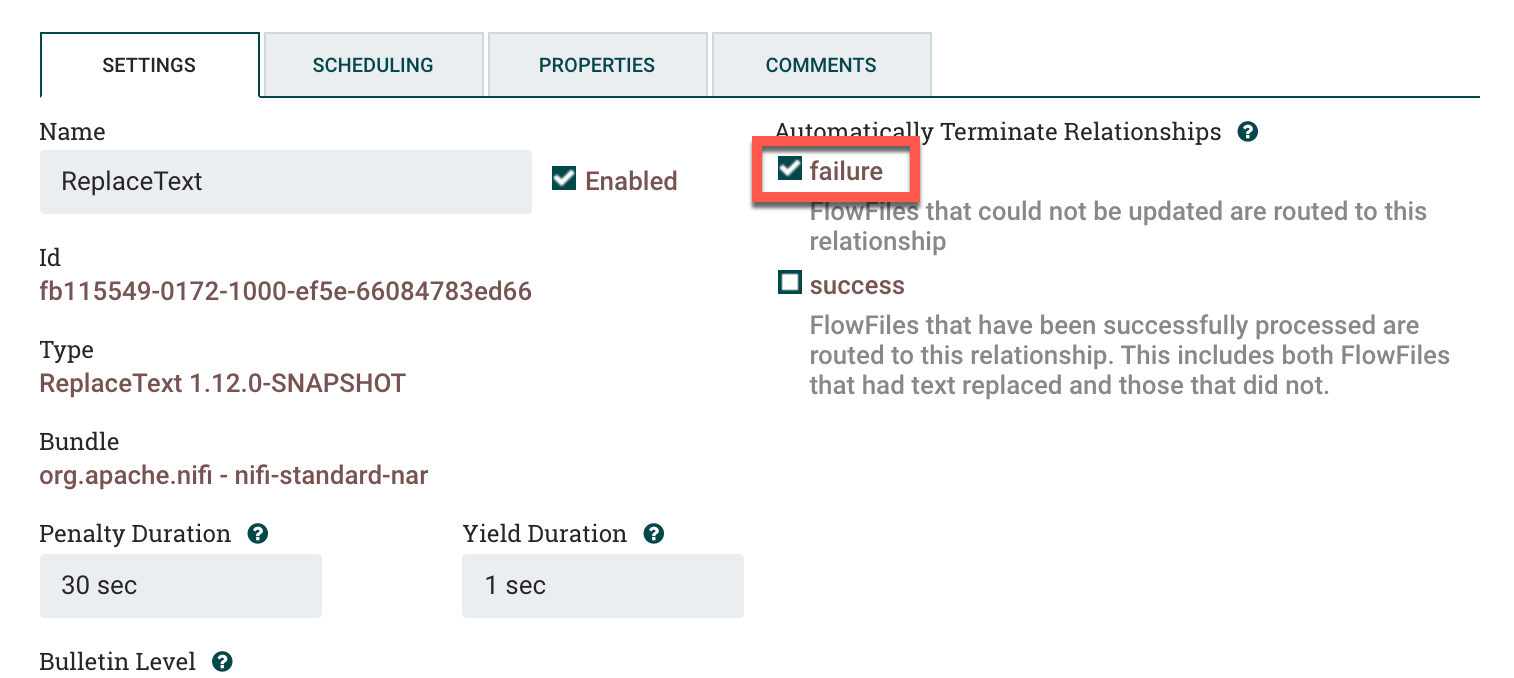
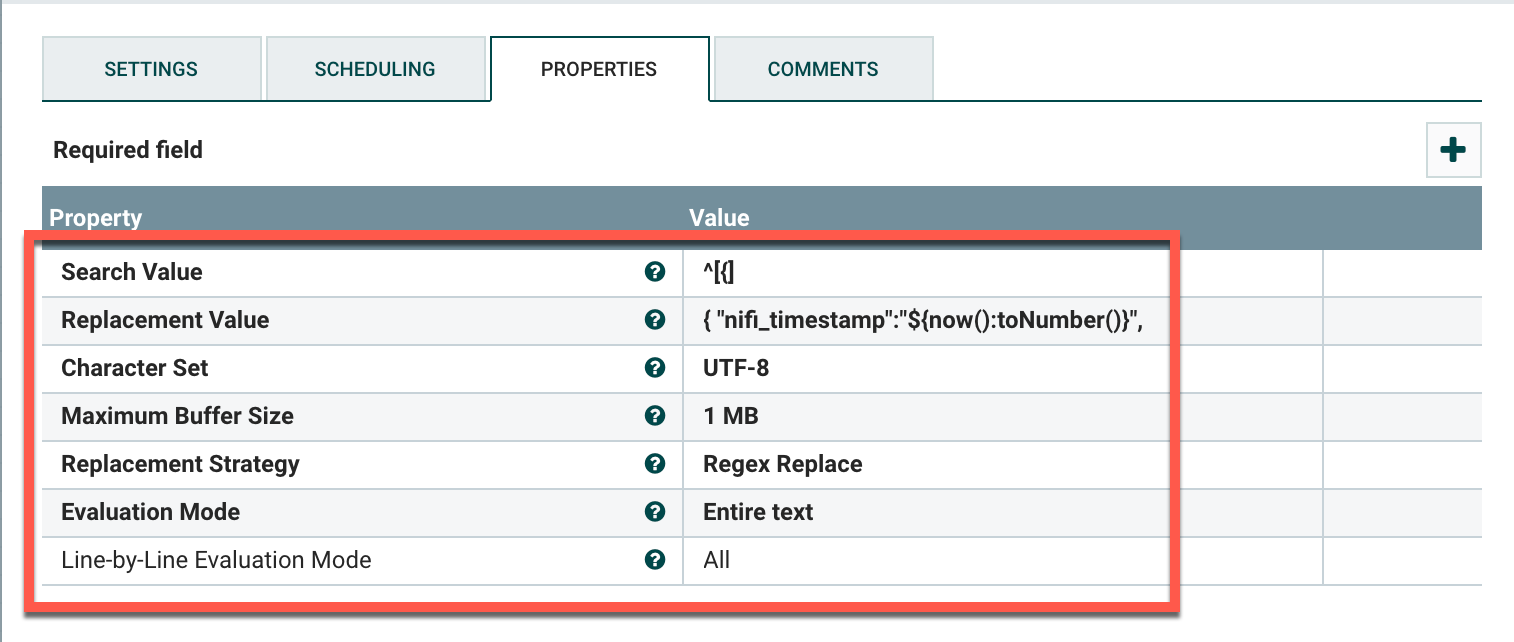
Drag a ReplaceText processor onto the canvas. Under Settings, click on failure under Automatically Terminate Relationships to drop any failure events. Under Properties, add the following values:
Search Value: ^[{]
Replacement Value: { "nifi_timestamp":"${now():toNumber()}",
Character Set: UTF-8
Maximum Buffer Size: 1 MB
Replacement Strategy: Regex Replace
Evaluation Mode: Entire text
Line-by-Line Evaluation Mode: AllYou should end up with this:
Quick explanation of what this does. It takes this:
{"state_id":7621166,"domain":"sensor","entity_id":"sensor.hue_master_bedroom_temperature","state":"76.1","attributes":"{\"on\": true, \"unit_of_measurement\": \"\\u00b0F\", \"friendly_name\": \"Master Bedroom Motion\", \"icon\": \"mdi:thermometer\", \"device_class\": \"temperature\"}","event_id":8082335,"last_changed":"2020-06-28 16:15:25.0","last_updated":"2020-06-28 16:15:25.0","created":"2020-06-28 16:15:26.0","context_id":"d58febf9e5d849aab1a0a676a95424cb","context_user_id":null}And changes it to this:
{"nifi_timestamp":"1593375334725","state_id":7621166,"domain":"sensor","entity_id":"sensor.hue_master_bedroom_temperature","state":"76.1","attributes":"{\"on\": true, \"unit_of_measurement\": \"\\u00b0F\", \"friendly_name\": \"Master Bedroom Motion\", \"icon\": \"mdi:thermometer\", \"device_class\": \"temperature\"}","event_id":8082335,"last_changed":"2020-06-28 16:15:25.0","last_updated":"2020-06-28 16:15:25.0","created":"2020-06-28 16:15:26.0","context_id":"d58febf9e5d849aab1a0a676a95424cb","context_user_id":null}The regex basically says "take the first { and replace it with {"nifi_timestamp":"1593375334725", in the string. The ${now():toNumber()} says take the current time and convert it to Unix epoch. Obviously not as feature-rich as UpdateAttribute but it gets the job done.
Sending the Data to Elasticsearch
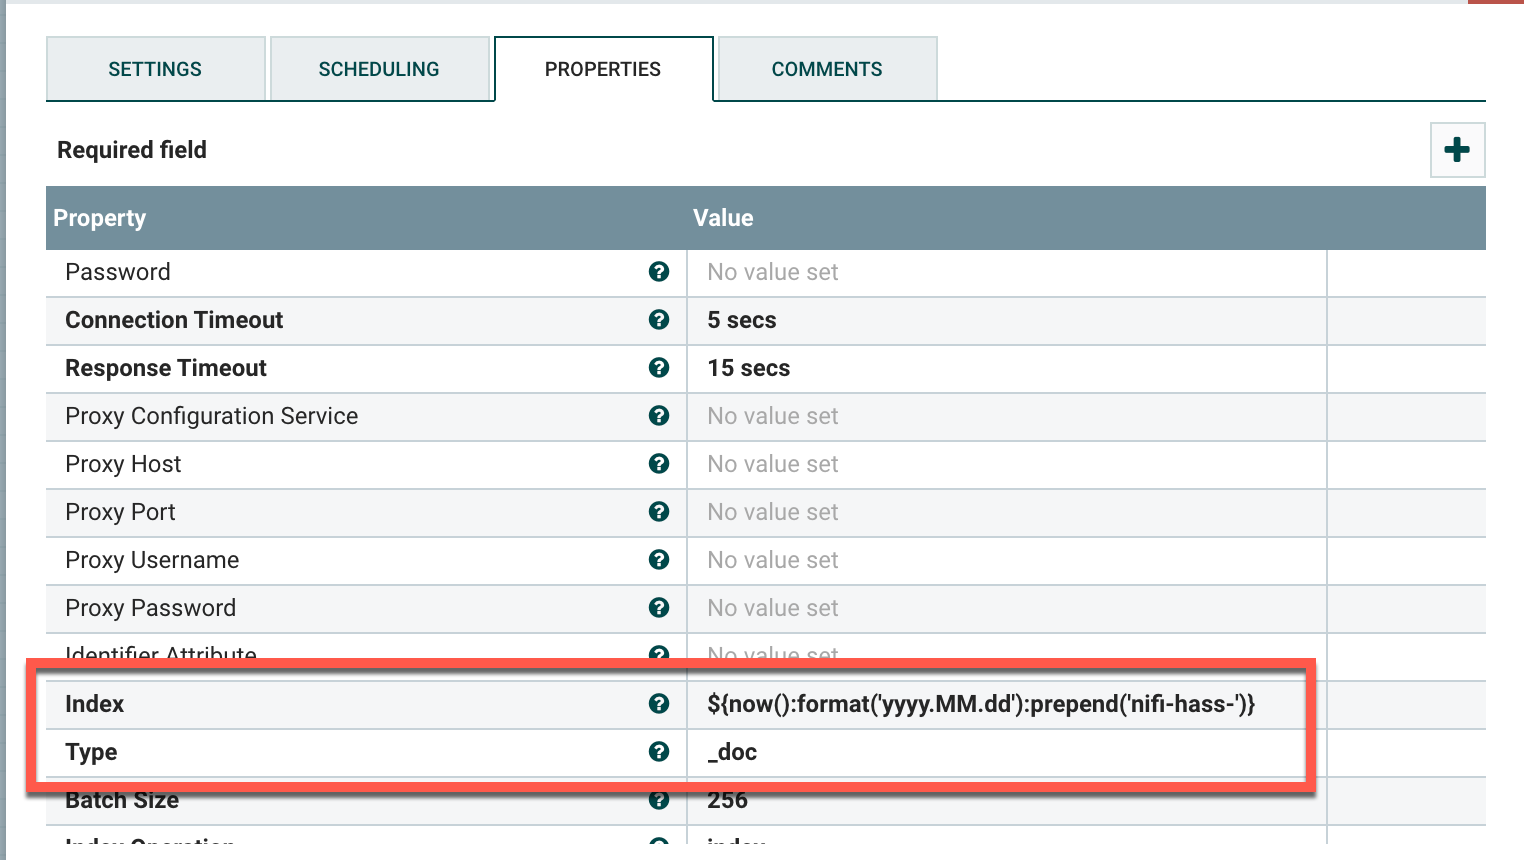
This is the easy part. Drag a PutElasticsearchHttp processor onto the canvas. Go into Settings and check failure, retry, and success under Automatically Terminate Relationships. Next go into Properties. You'll want to use the following values, swapping out the ones that are particular to your environment:
Elasticsearch URL: http://your.elastic.server:9200
Index: ${now():format('yyyy.MM.dd'):prepend('nifi-hass-')}
Type: _docThe Index value says take today's date, change the format to yyyy.MM.dd, and prepend the index name with nifi-hass-.
This should be the end result:

Combining Everything Together
Your setup will likely vary from what I have above. Either way, at this point you can combine everything together, right-click on the canvas, and click Start. At this point you should see data being sent to Elasticsearch.
Creating the Index in Kibana
Create the Index Pattern
Almost done. Go into Kibana, click on the gear for Management, then Index Patterns, and then Create index pattern.
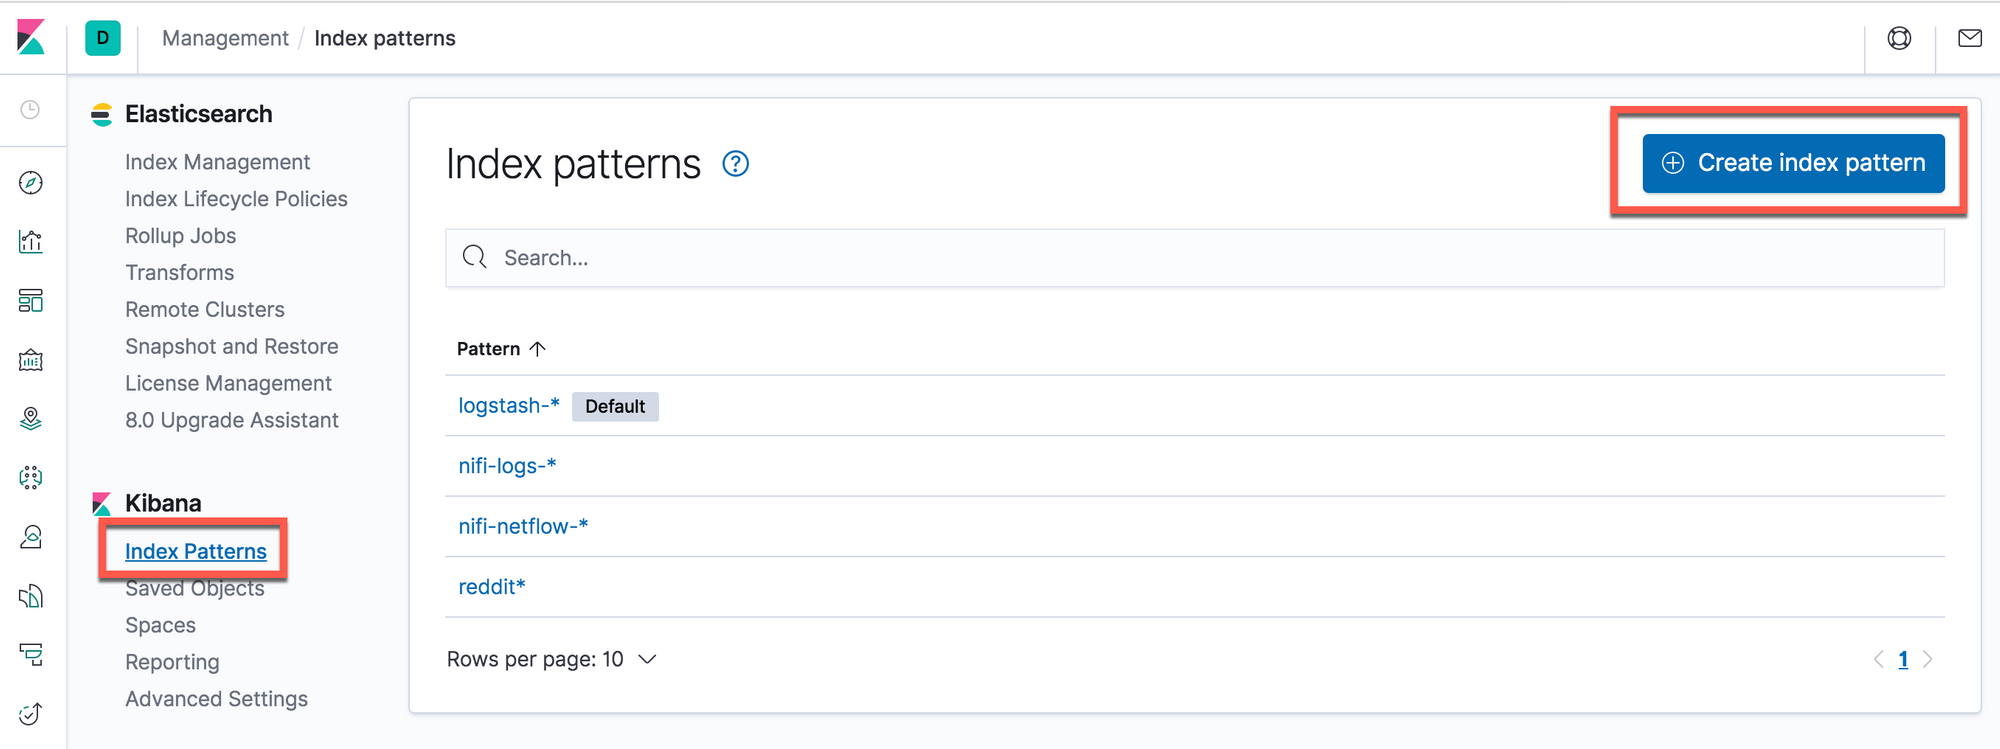
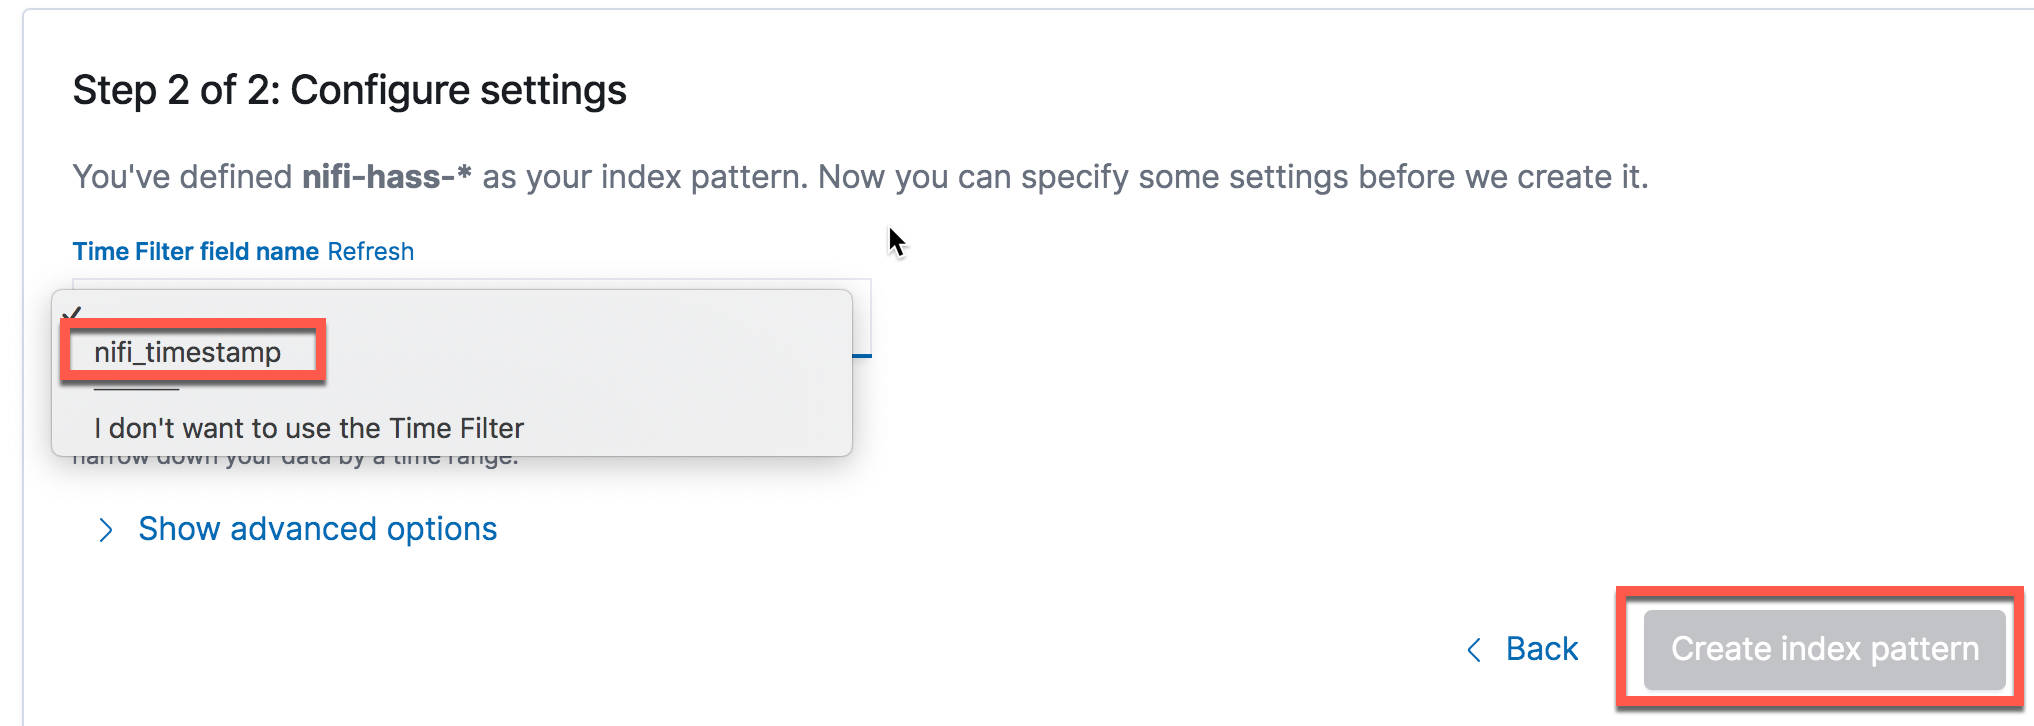
Under Define index pattern, select a pattern that will cover the index format that you'd created above. In my case it would be nifi-hass-* to match the nifi-hass-2020.06.27 format. Click Next step. On the next screen you'll see an option to use nifi_timestamp as the Time Filter. Select that and Create index pattern.
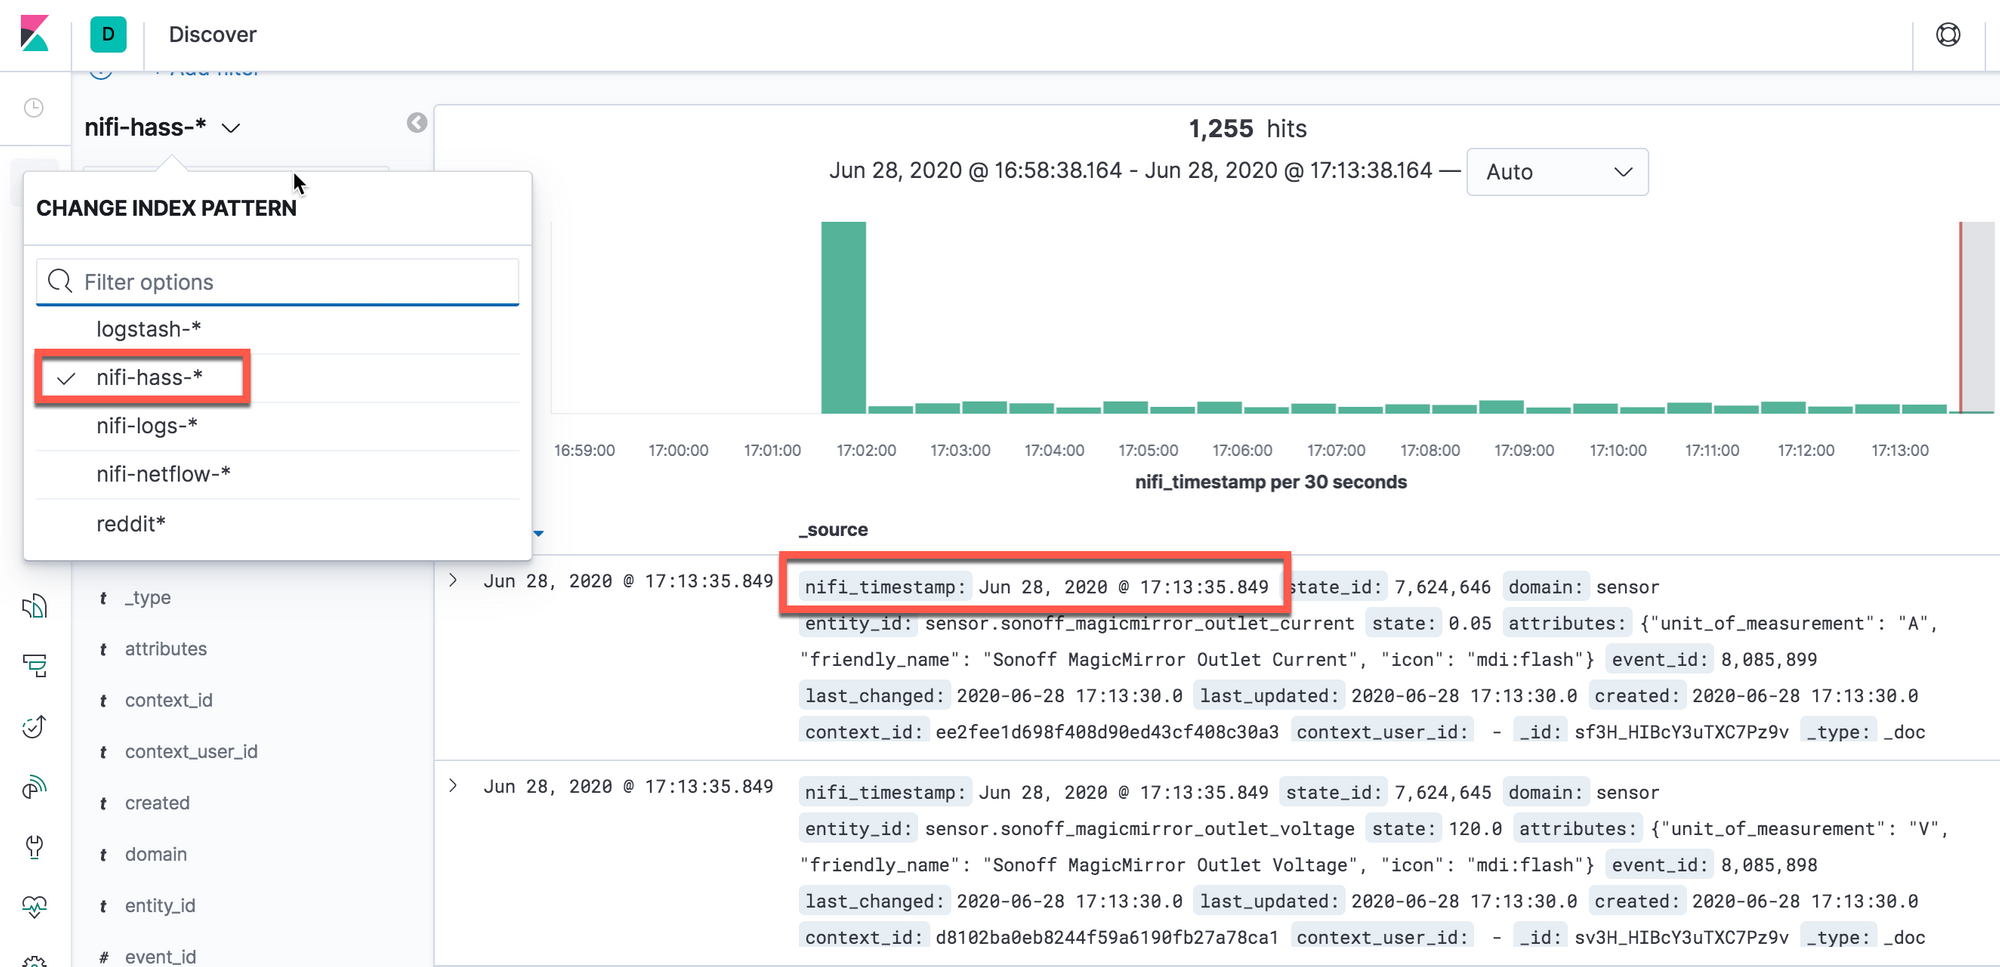
Verifying the Data
You should now be able to view the data in Kibana, timestamp and all. Click on theDiscover icon and select your index pattern, e.g. nifi-hass-*. You should have output similar to the following if all went well. Hope this helped!