

My last post covered the bare-bones basics of using Apache Nifi to load-balance incoming syslog events. In this example we’re going to take it a step further: query a MySQL database containing entity events from Home Assistant, reformat the output to JSON, and then output that to a syslog server.
Let’s get started by downloading the necessary Java connector. This is also assuming that you’ve installed NiFi in /opt/nifi per the previous instructions.
mkdir -p /opt/nifi/drivers
cd /opt/nifi/drivers
wget https://repo1.maven.org/maven2/mysql/mysql-connector-java/8.0.19/mysql-connector-java-8.0.19.jar
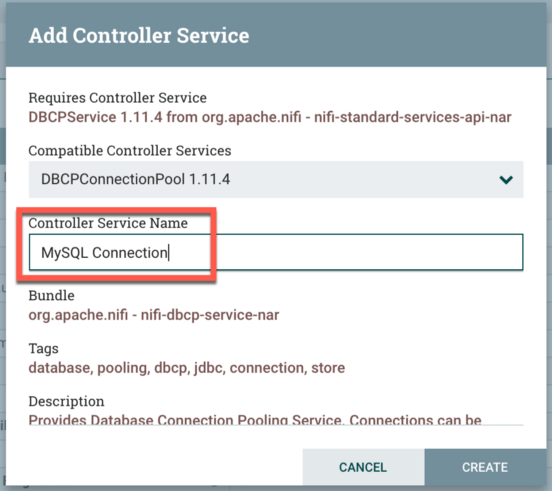
At this point go to the Properties tab. Here we’re going to configure the MySQL service. Next to Database Connection Pooling Service, click the blank space and select Create New Service. The only thing you’ll need to do is rename the Controller Service Name to something like MySQL Connection. Click Create when finished.

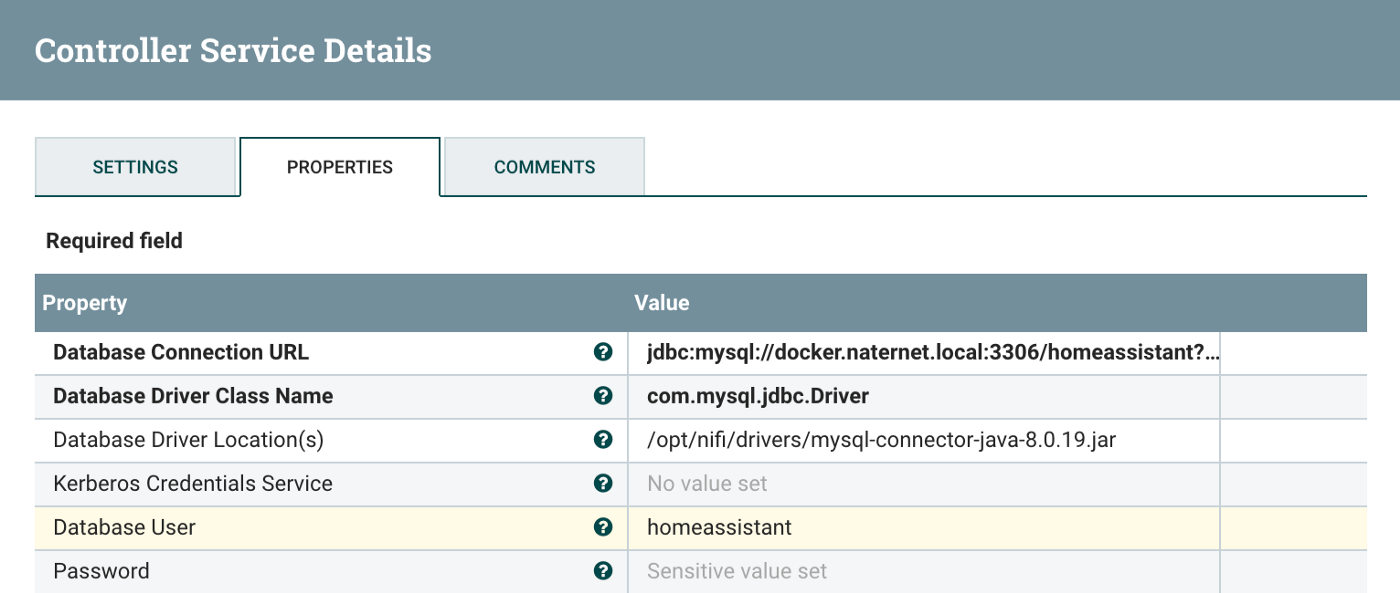
On the settings page, you’ll now see a “right arrow” to the right of the Database Connection Pooling Service in the processor settings. Click on the arrow and then click on the gear icon for the previous MySQL Connection service that you’d created. There are a few settings here that will need to be changed to reflect your environment. As far as the database URL structure, you’ll need to change the hostname at the start of the URL and the database name at the end of the URL.
Database Connection URL: jdbc:mysql://hostname:3306/databasename?serverTimezone=UTC
Database Driver Class Name: com.mysql.jdbc.Driver
Database Driver Location(s): /opt/nifi/drivers/mysql-connector-java-8.0.19.jar
Database User: A user with permissions to access the DB.
Database Password: Password for above.
My particular example:
You’ll also want to ensure the service is enabled. In my case, it was disabled after I’d created it. Easy enough to correct:

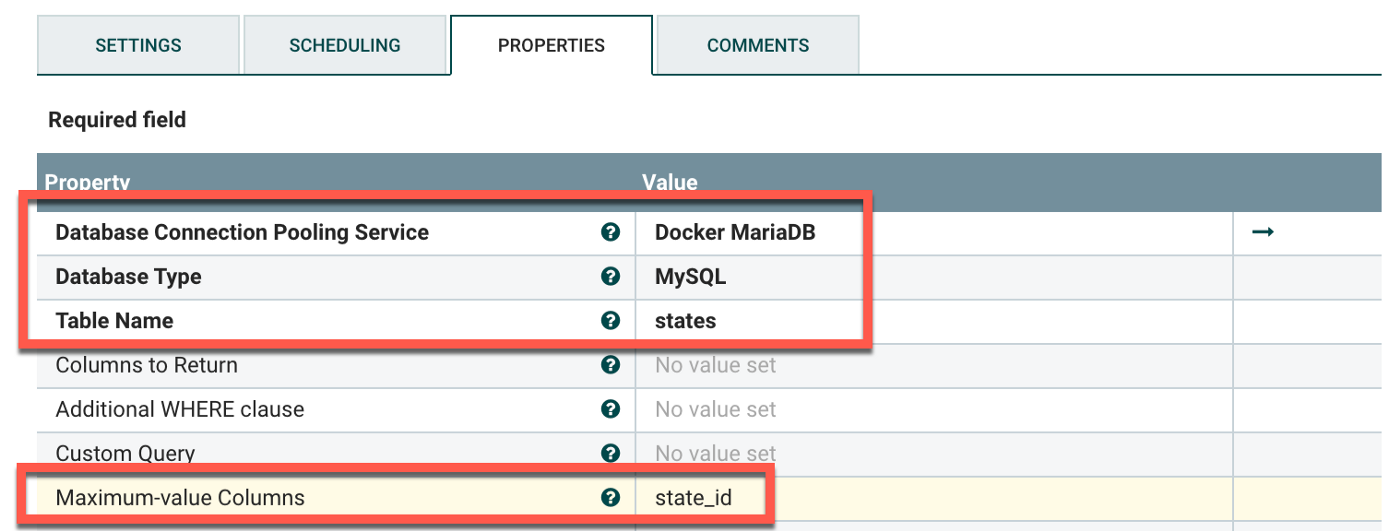
Next get back into the settings for the QueryDatabaseTable processor. You’ll now plug in the settings for the database on the Properties tab.
Database Connection Pooling Service: The one you'd created above.
Database Type: MySQL
Table Name: The table of the database you're querying.
Maximum-value Columns: The incrementing value column.
It’s important to specify the Maximum-value Columns, otherwise the connection will pull the same data over and over. It acts as a placeholder so the processor knows what data had previously been collected. The column should be something that auto-increments as rows are added to the table. For Home Assistant, there’s a state_id column that increments by 1 every time a row is added.
My particular example:
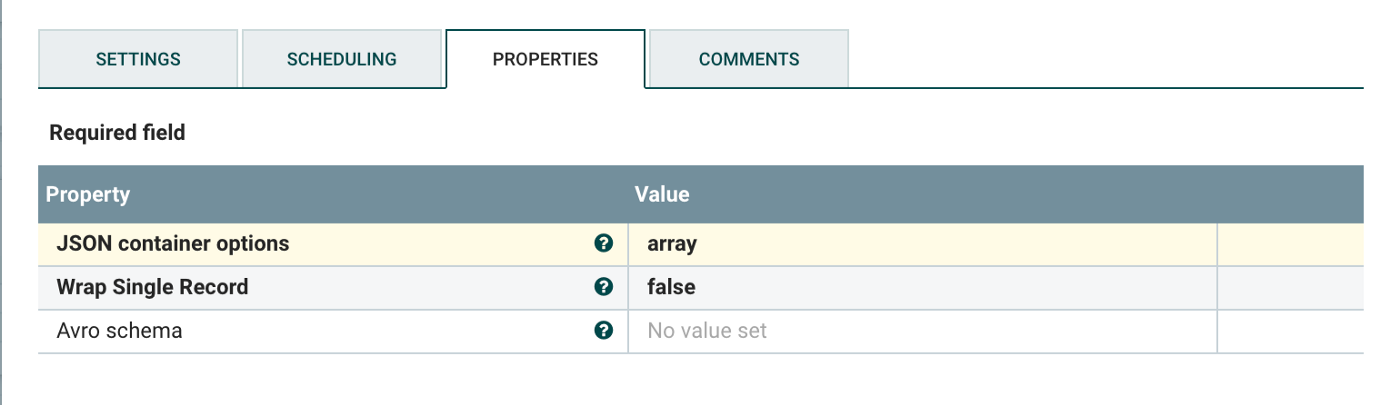
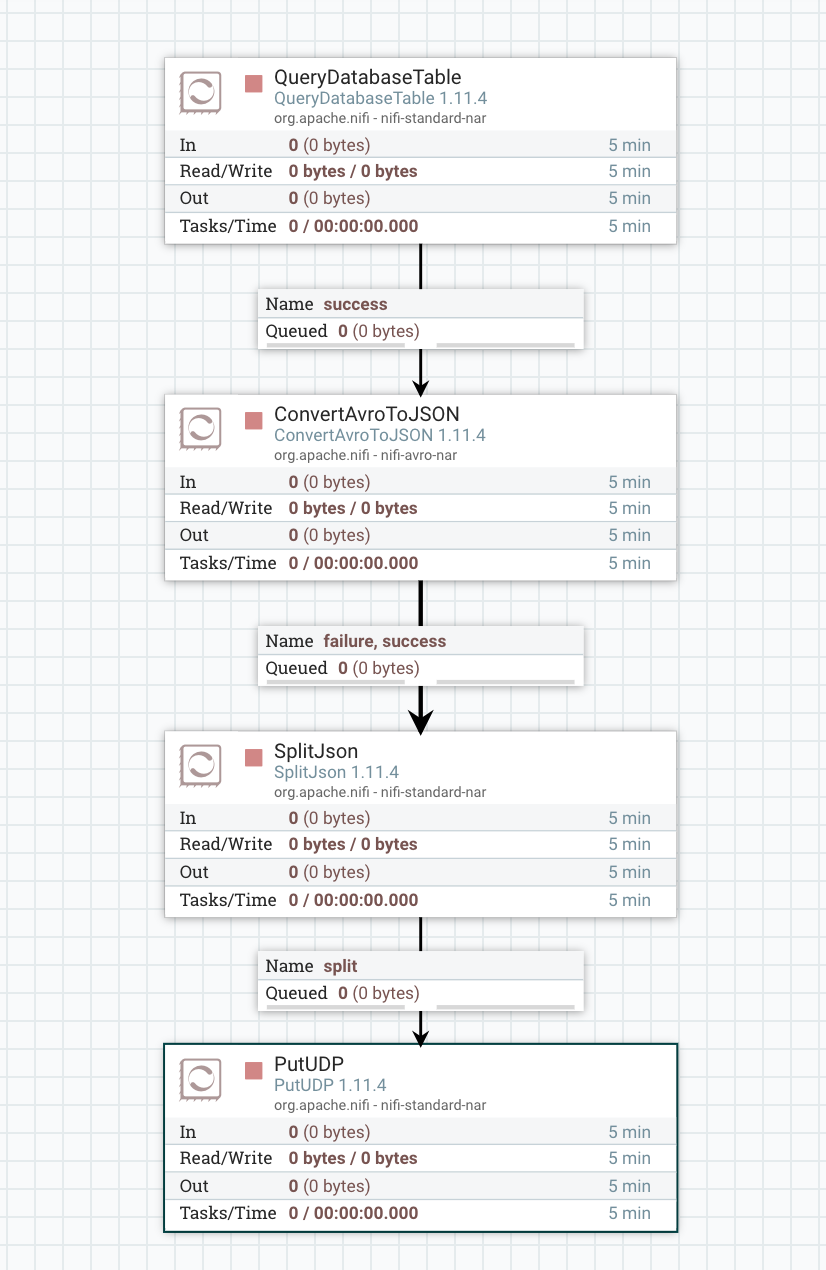
…and that was the complicated part. The rest is fairly straight forward. Now that we’ve got the database connection configured, we’ll need to modify the output. The data comes out of the processor in Avro format, but we want to convert this to JSON. Create a ConvertAvroToJSON processor and connect the previous QueryDatabaseTable to it. Select success for the value although that’s probably the only option. You don’t need to change anything with the ConvertAvroToJSON processor but these are the settings:
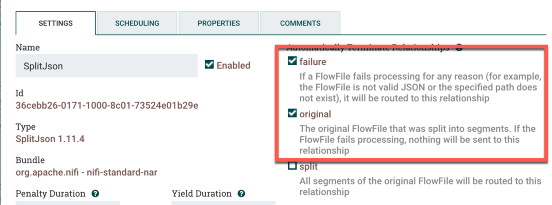
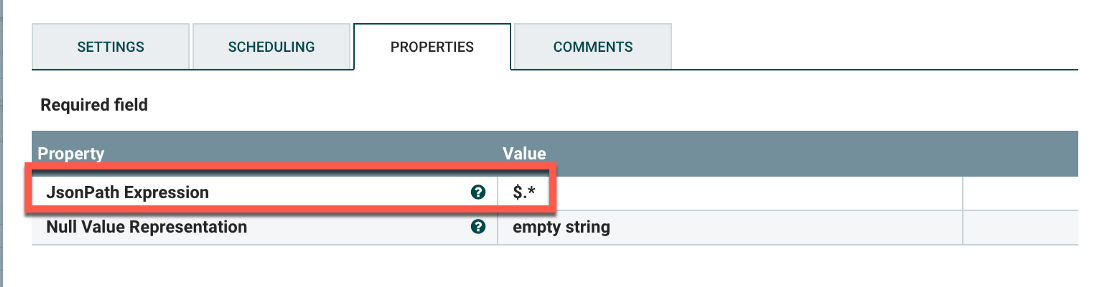
The output will be in JSON. Unmodified, the flow will include a huge number events from the database in one giant blob. We’ll need to split these apart into individual events using the SplitJSON processor. There is only a single value to change:
JsonPath Expression: $.*
You’ll also want to select failure and original under Automatically Terminate Relationships in the processor settings. We only want it to pass the split JSON data onto the next processor. My example:
Connect the ConvertAvroToJSON processor to the SplitJSON processor for both success and failure. Almost done! The last step is to output the data in pseudo-syslog format, i.e. we’re just going to send it somewhere on 514/UDP and leave it up to the syslog receiver to timestamp it.
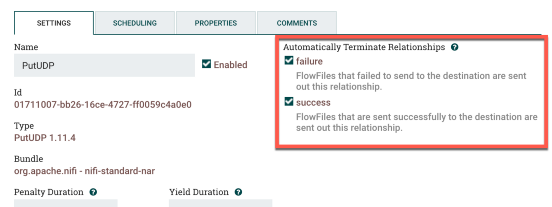
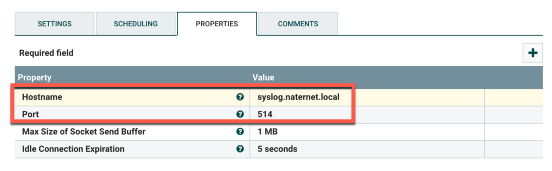
At this point we’ll create a PutUDP processor. You’ll only need to plug in the hostname and the port. You’ll also want to go to the processor settings and check success and failure under Automatically Terminate Relationships. This is my particular example:
Last step: connect the SplitJSON processor to the PutUDP processor. Select split as the relationship since we only want to send over the split JSON data. You’ll have something like this when everything is done:
At the point you’d need to right-click and start everything up. Hope this helps! This can likely be adapted to just about any database that is supported by JDBC.