

Log ingestion has traditionally been a problem in large environments. Between different log formats, configuration options, and numerous input and output methods, what seems like a simple endeavor can turn into a massive time sink. Behold Apache NiFi: it’s designed specifically to process and distribute data. Best of all, NiFi is fairly simple to get up and running.
I’m currently running NiFi on Ubuntu 19.10 Eoan Ermine. NiFi was installed using the official documentation along with references to a secondary guide that was a bit more clear. Once it’s up and running, you should be able to connect through your web browser on port 8080/TCP.
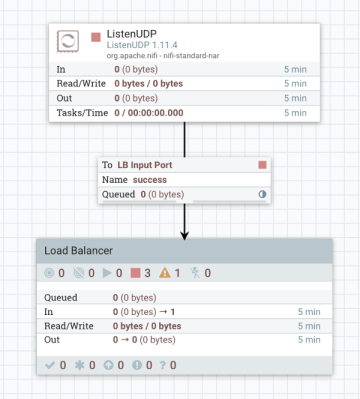
My first use case was simple: leverage NiFi as a basic syslog load balancer. Send data to NiFi, do not modify the data, and then redistribute it to different destinations in a round-robin format. Let’s start with the first step of creating a UDP listener to receive syslog events. There is a syslog processor that will check RFC compliance, but we really don’t care about the log format and just want to pass it on to the destination nodes. In that case we’ll use the ListenUDP processor with a few simple settings:
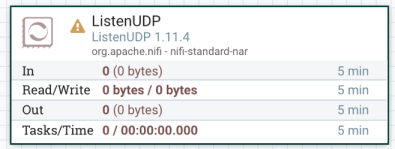
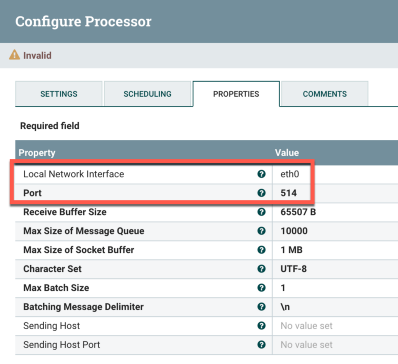
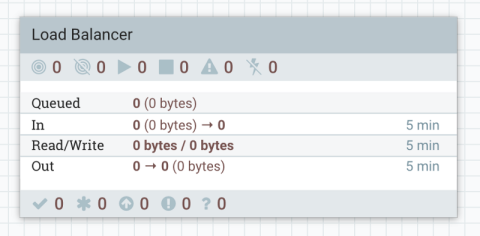
Basically you just need to define the port to listen on, with 514 being the default for syslog. Next we’ll want to create a Process Group. The process group is a group of objects that are combined to form a single logical object. We can then route data to the object and modify the load balancing method of a single connection to that group. Once you’ve created the process group, double-click on it so you can add new processors inside the group.
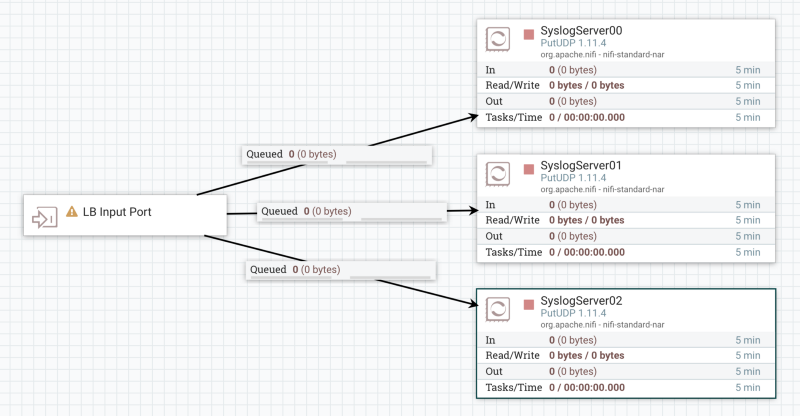
Once in the “Load Balancer” process group, we’ll first add the syslog destinations. We’ll use the PutUDP processor for this. Open up the settings for the process and select Failure and Success under Automatically Terminate Relationships. This basically tells the processor the flush the syslog event after it’s been routed. Next, under properties, put in the hostname and port. The hostname is the syslog destination and the port will likely be 514.
Once this is done, copy and paste the process to reflect the number of syslog destinations in the load balance. In this example we’ll have 3 of them. Copy and paste the original process so there is 3 total. Then go into each one and plug in a new hostname. You’ll ultimately end up with 3 PutUDP processors, with each one having a different syslog destination.
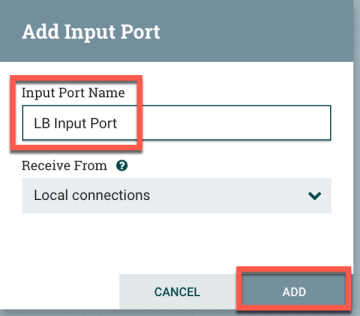
Next we’ll create an Input Port. This basically acts as the interface to the process group. There’s no real configuration on the input port other than giving it a name. Once you’d done that, connect it to the PutUDP processors that you’d previously created.
Finally, click on Apache NiFi in the bottom-left corner of your web browser. This will take you out of the process group and back onto the main canvas. From here we’ll connect the original GetUDP processor to the PutUDP process group that we’d created. The settings on the connection between the two will allow you to specify the load balancer settings.
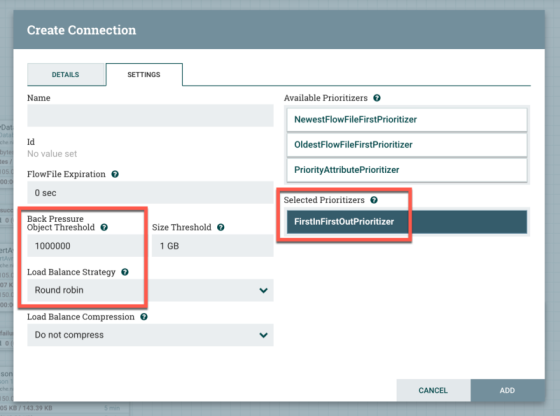
In my example, I’ve increased the Back Pressure Object Threshold from 10,000 to 1,000,000 objects. This will allow 1M UDP packets to remain in the queue. I’ve also selected Round Robin as the Load Balance Strategy and FirstInFirstOut as the Prioritizer.
The next step is to start everything. Simply right-click on any open space on the canvas and select Start. You should see everything turn from red to green. If everything is working correctly, the syslog events should get received by NiFi and then routed back out to the 3 syslog destinations in round-robin format. To test this, I ran tcpdump to look at what was being sent:
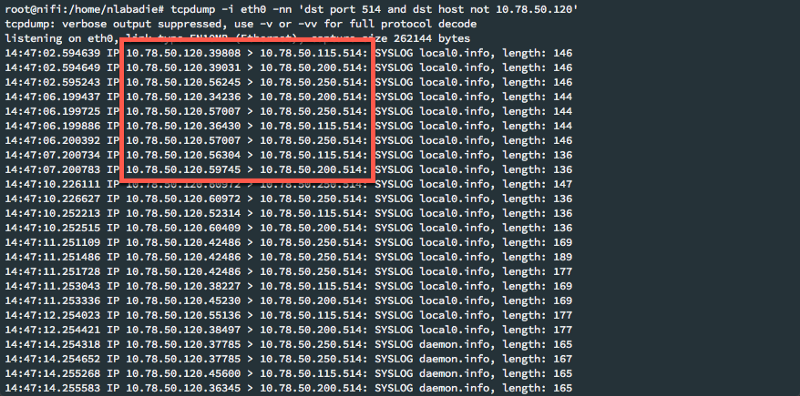
Success! We can see it is being load balanced as expected. Hopefully this is a good starting point for what can be done with Apache NiFi.